
Introduction
From time to time you might get into this situation. You either have an old laptop with a hard disk drive (HDD) or you have a newer model with a small solid state drive (SSD) like 120GB and want to perform an upgrade. Basically you can replace the hard drive of every device. But first I would recommend you to look up which drive is built-in into your device, there are in the meantime several building types like 2,5”, M.2, PCIe, NVMe. So I definitely suggest you to read into this topic, so you get an overview and buy the right hardware for your device. Another recommendation from my side is to check out iFixit. Probably you will find some useful information regarding the disassembly of your device and the hardware replacement/upgrade.
Clone HDD Macrium Reflect
Prerequisites
You will need the following things in order to clone the hard drive:
Depending on the type of hard drive, you will need one of these adapters (if it is a laptop, for a workstation you maybe have a second port to connect both simultaneously):
- 2,5” SATA to USB
- M.2 SATA to USB
- M.2 NVMe to USB
And an application for the cloning process. From my experience, the best one is Macrium Reflect Free, which is free for home use.
Cloning Process
When you installed Macrium Reflect successfully, please connect the new hard drive via your adapter to your laptop and start the application. Your screen should look like this. In my case there are now two SSDs available. The existing one with 120GB and the three partitions, and the completely empty new one with 450GB on the bottom.
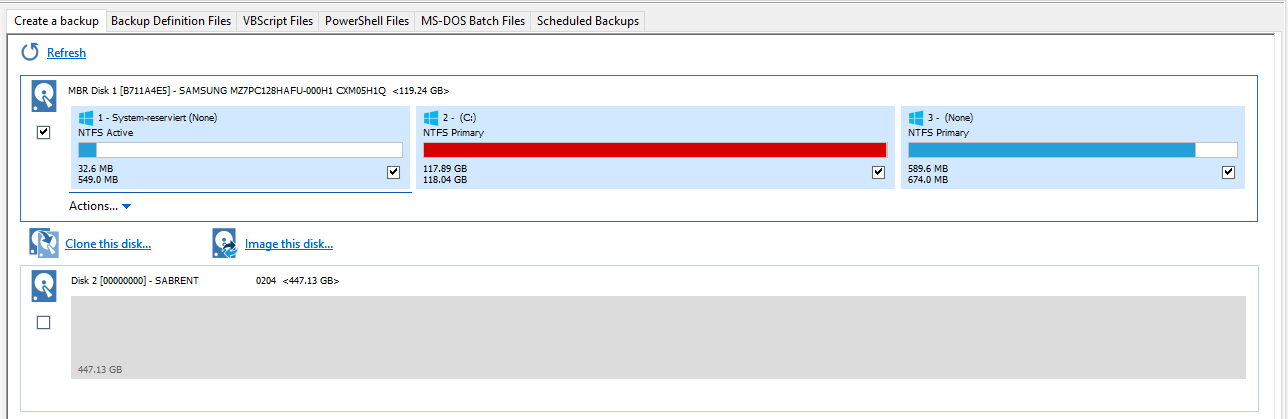
Firstly, you need to click on Clone this Disk. Now another window will pop up where you need to select the partitions you want to copy. Probably you want to copy all of them.
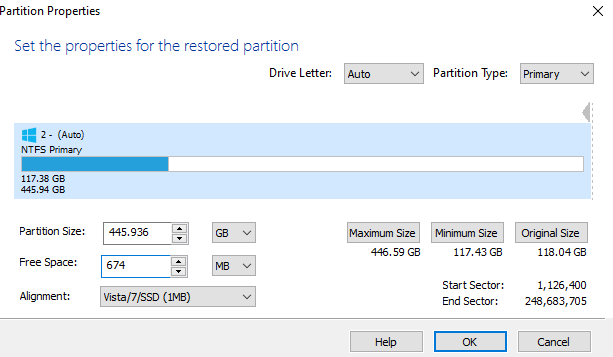
Important: Please select them by dragging and dropping them. After dragging the main partition which you want to increase, click on Cloned Partition Properties before you drag & drop the next one.
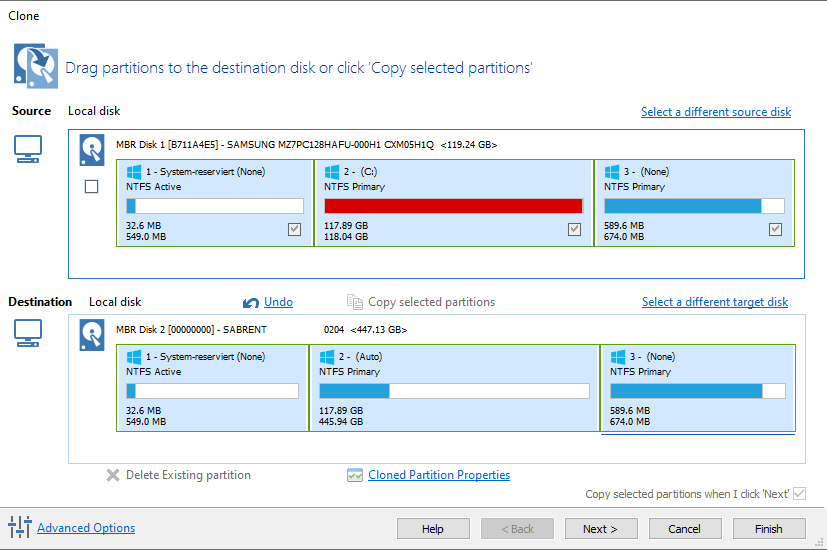
Secondly, please edit the Partition Size or Free Space to increase the available partition size according to your needs or upgrade. I always edit the free space and keep enough for the last partitions. So in this case I left 674MB free for the last partition. Then I simply drag and drop the last one with 674MB to the new hard drive.
Finally, after hitting Next you can define the log file location and save your settings. After that you are ready to start the actual cloning process of the hard drive to the new one. In my case there were three operations (three partitions). Depending on the speed of the old hard drive, the new hard drive as well as the adapter and amount of data this will take some time to process. 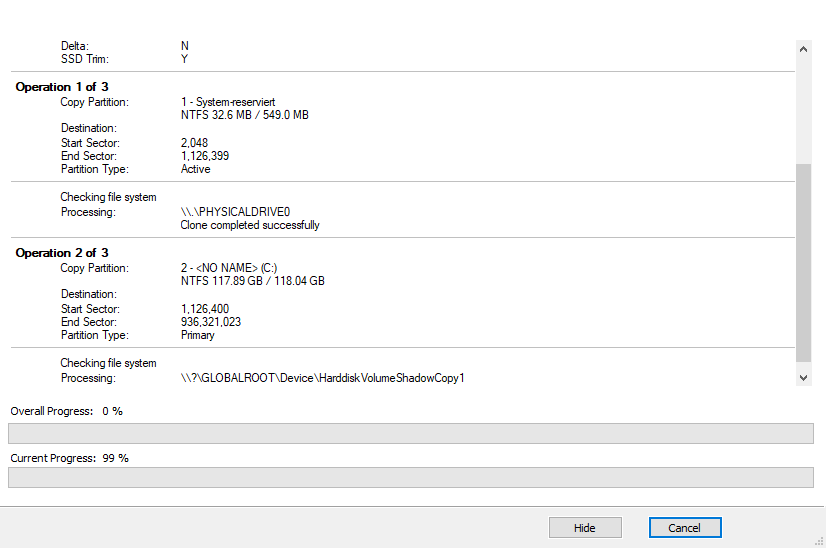
Macrium Reflect Free: Cloning ProgressAs soon as the process is finished, you can safely disconnect the new hard drive and start replacing the hardware!
Clone HDD Macrium Reflect
Technology photo created by freepic.diller – www.freepik.com
 Disassembly")


 of your Windows 10 device")
 Disassembly")


 of your Windows 10 device")