
This week I wanted to upgrade the hard disk drive (HDD) of an Acer Aspire V5-573G to a solid state drive (SSD). Basically, this device is still very good for Office usage, and I simply did not want to sell it but to bring out the best of the Acer laptop. From my point of view the bottleneck was definitely the hard disk drive which should obviously be replaced by a much faster solid state drive. I decided to document the steps of the replacement with pictures to give you a guide if you also need to change it: Acer Aspire V5-573G Disassembly
Firstly, you need to remove all the screws from the bottom case of the device. I took a picture and marked all of them with a red circle:

Secondly, after removing all the screws from the bottom, you can remove the case by using a plastic card for example. Be careful because the plastic parts can break easily. But with the help of this plastic card, it is basically pretty easy.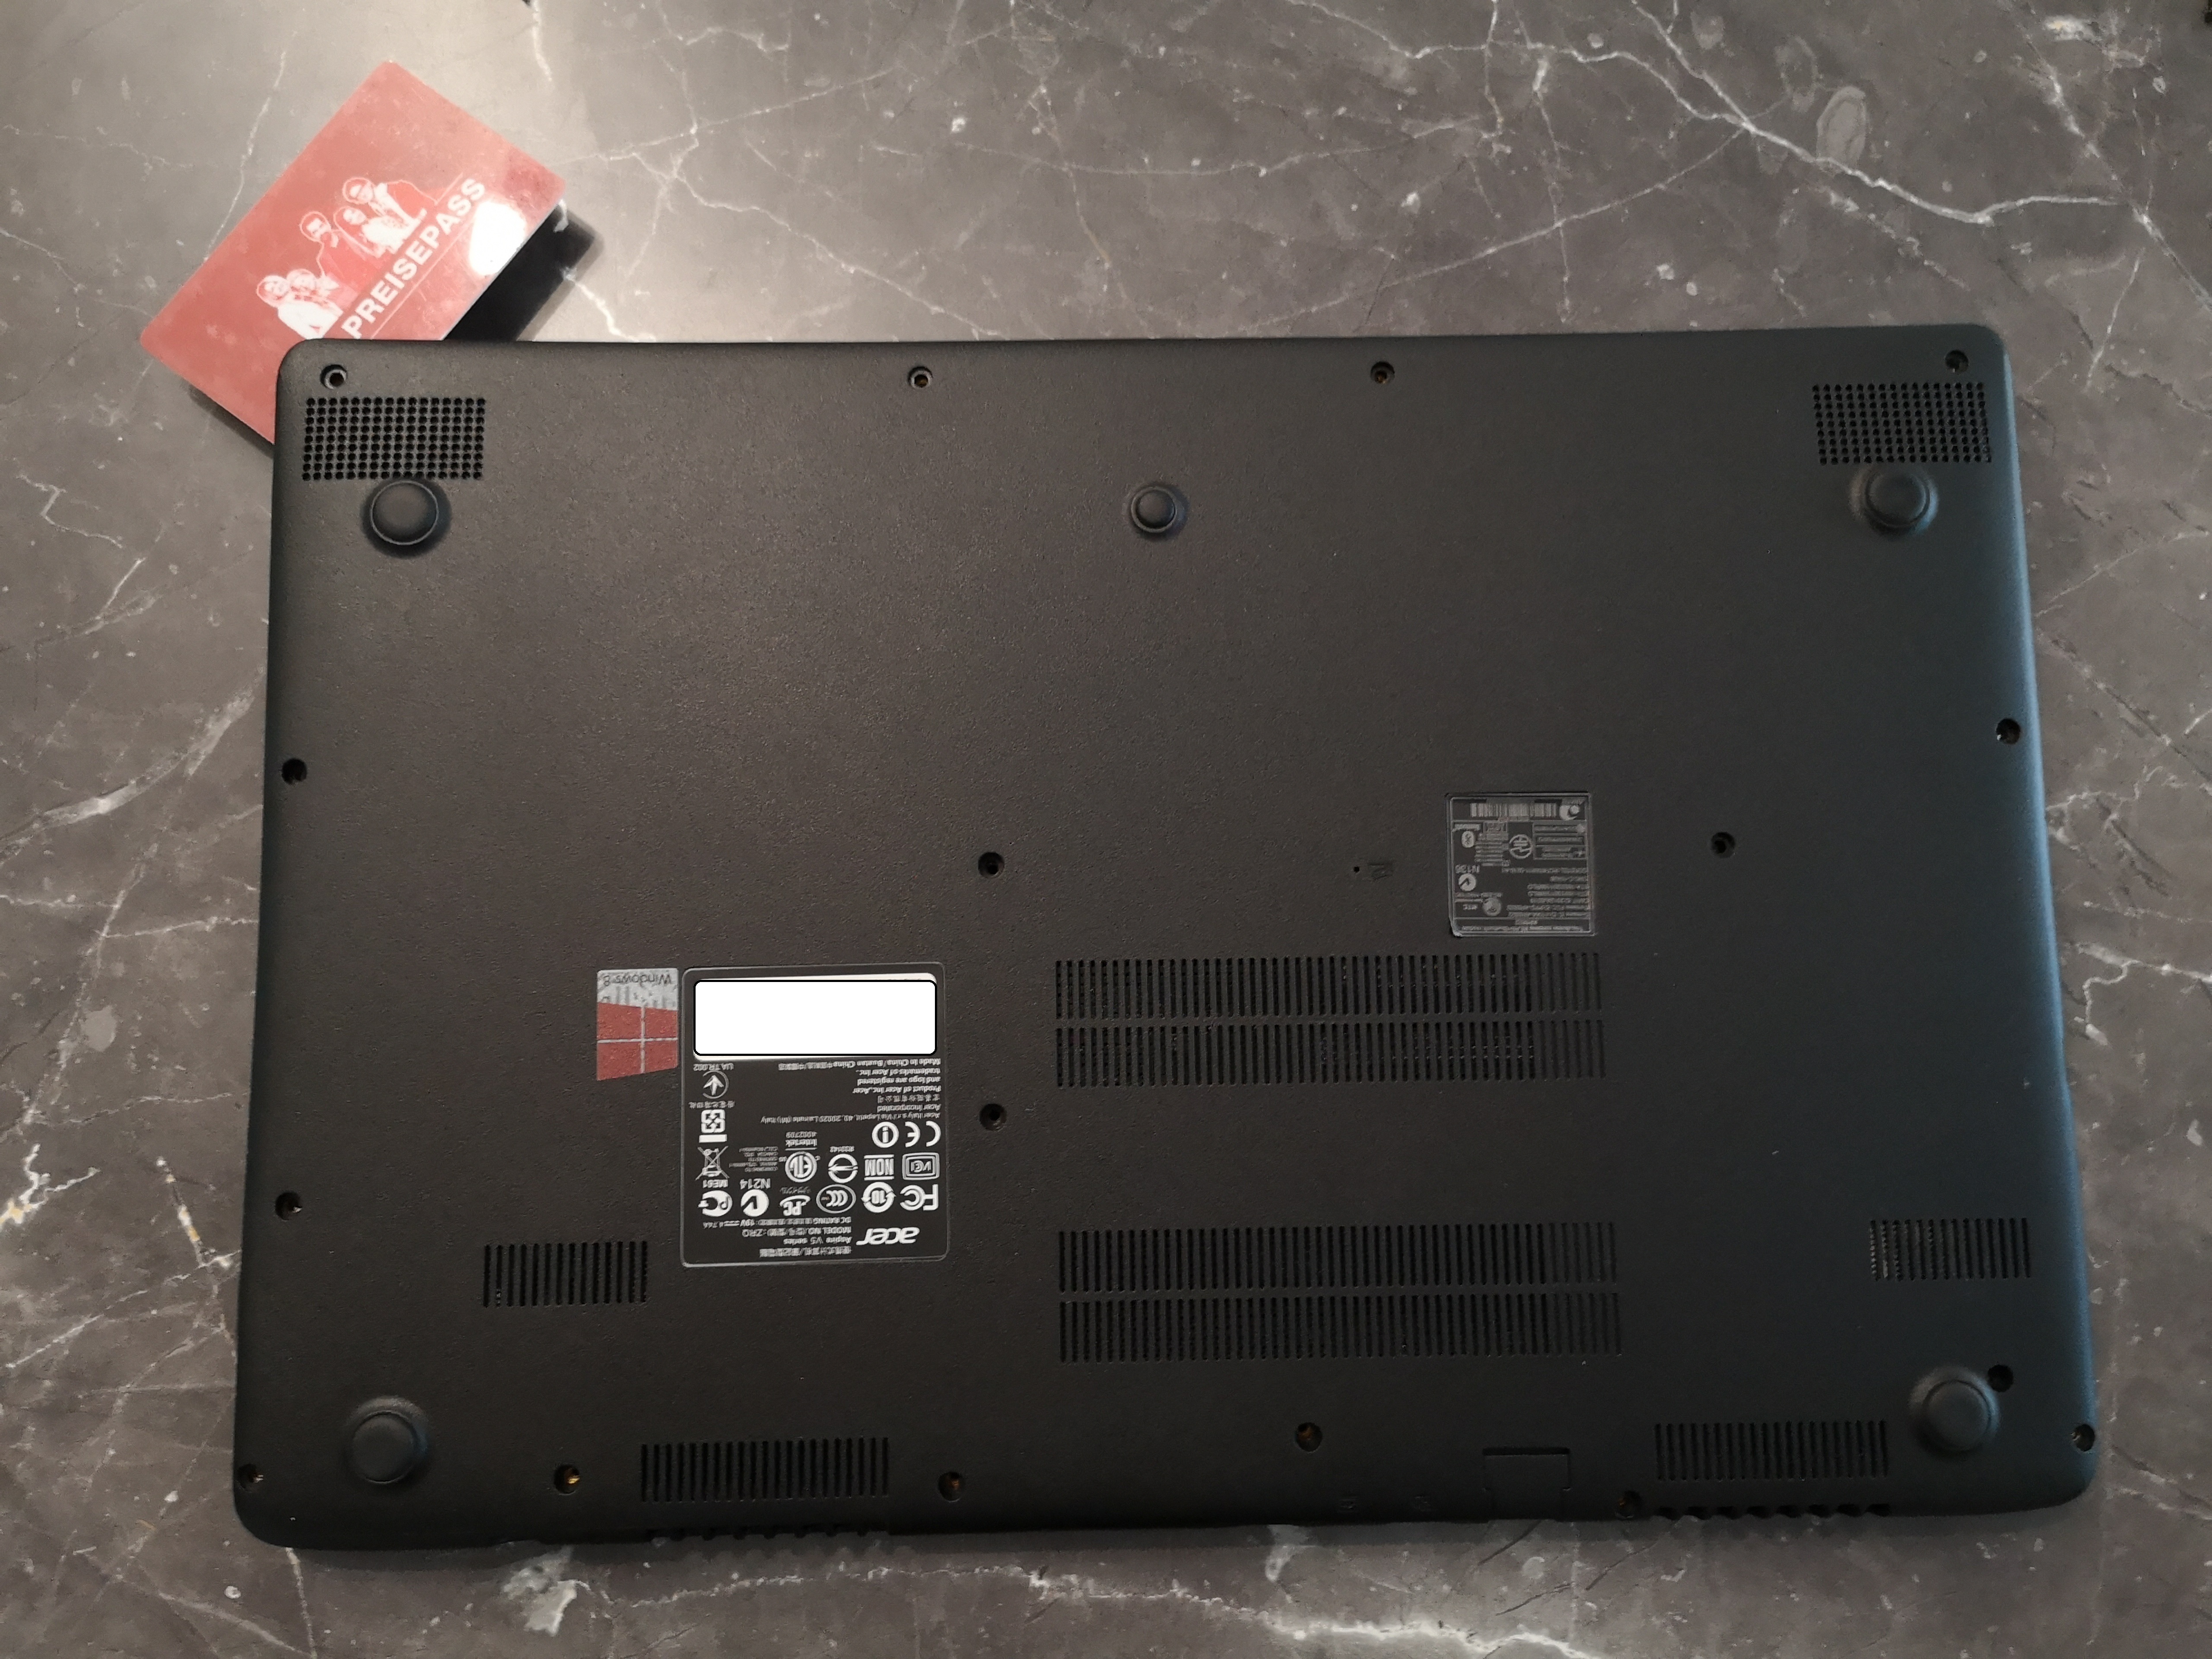
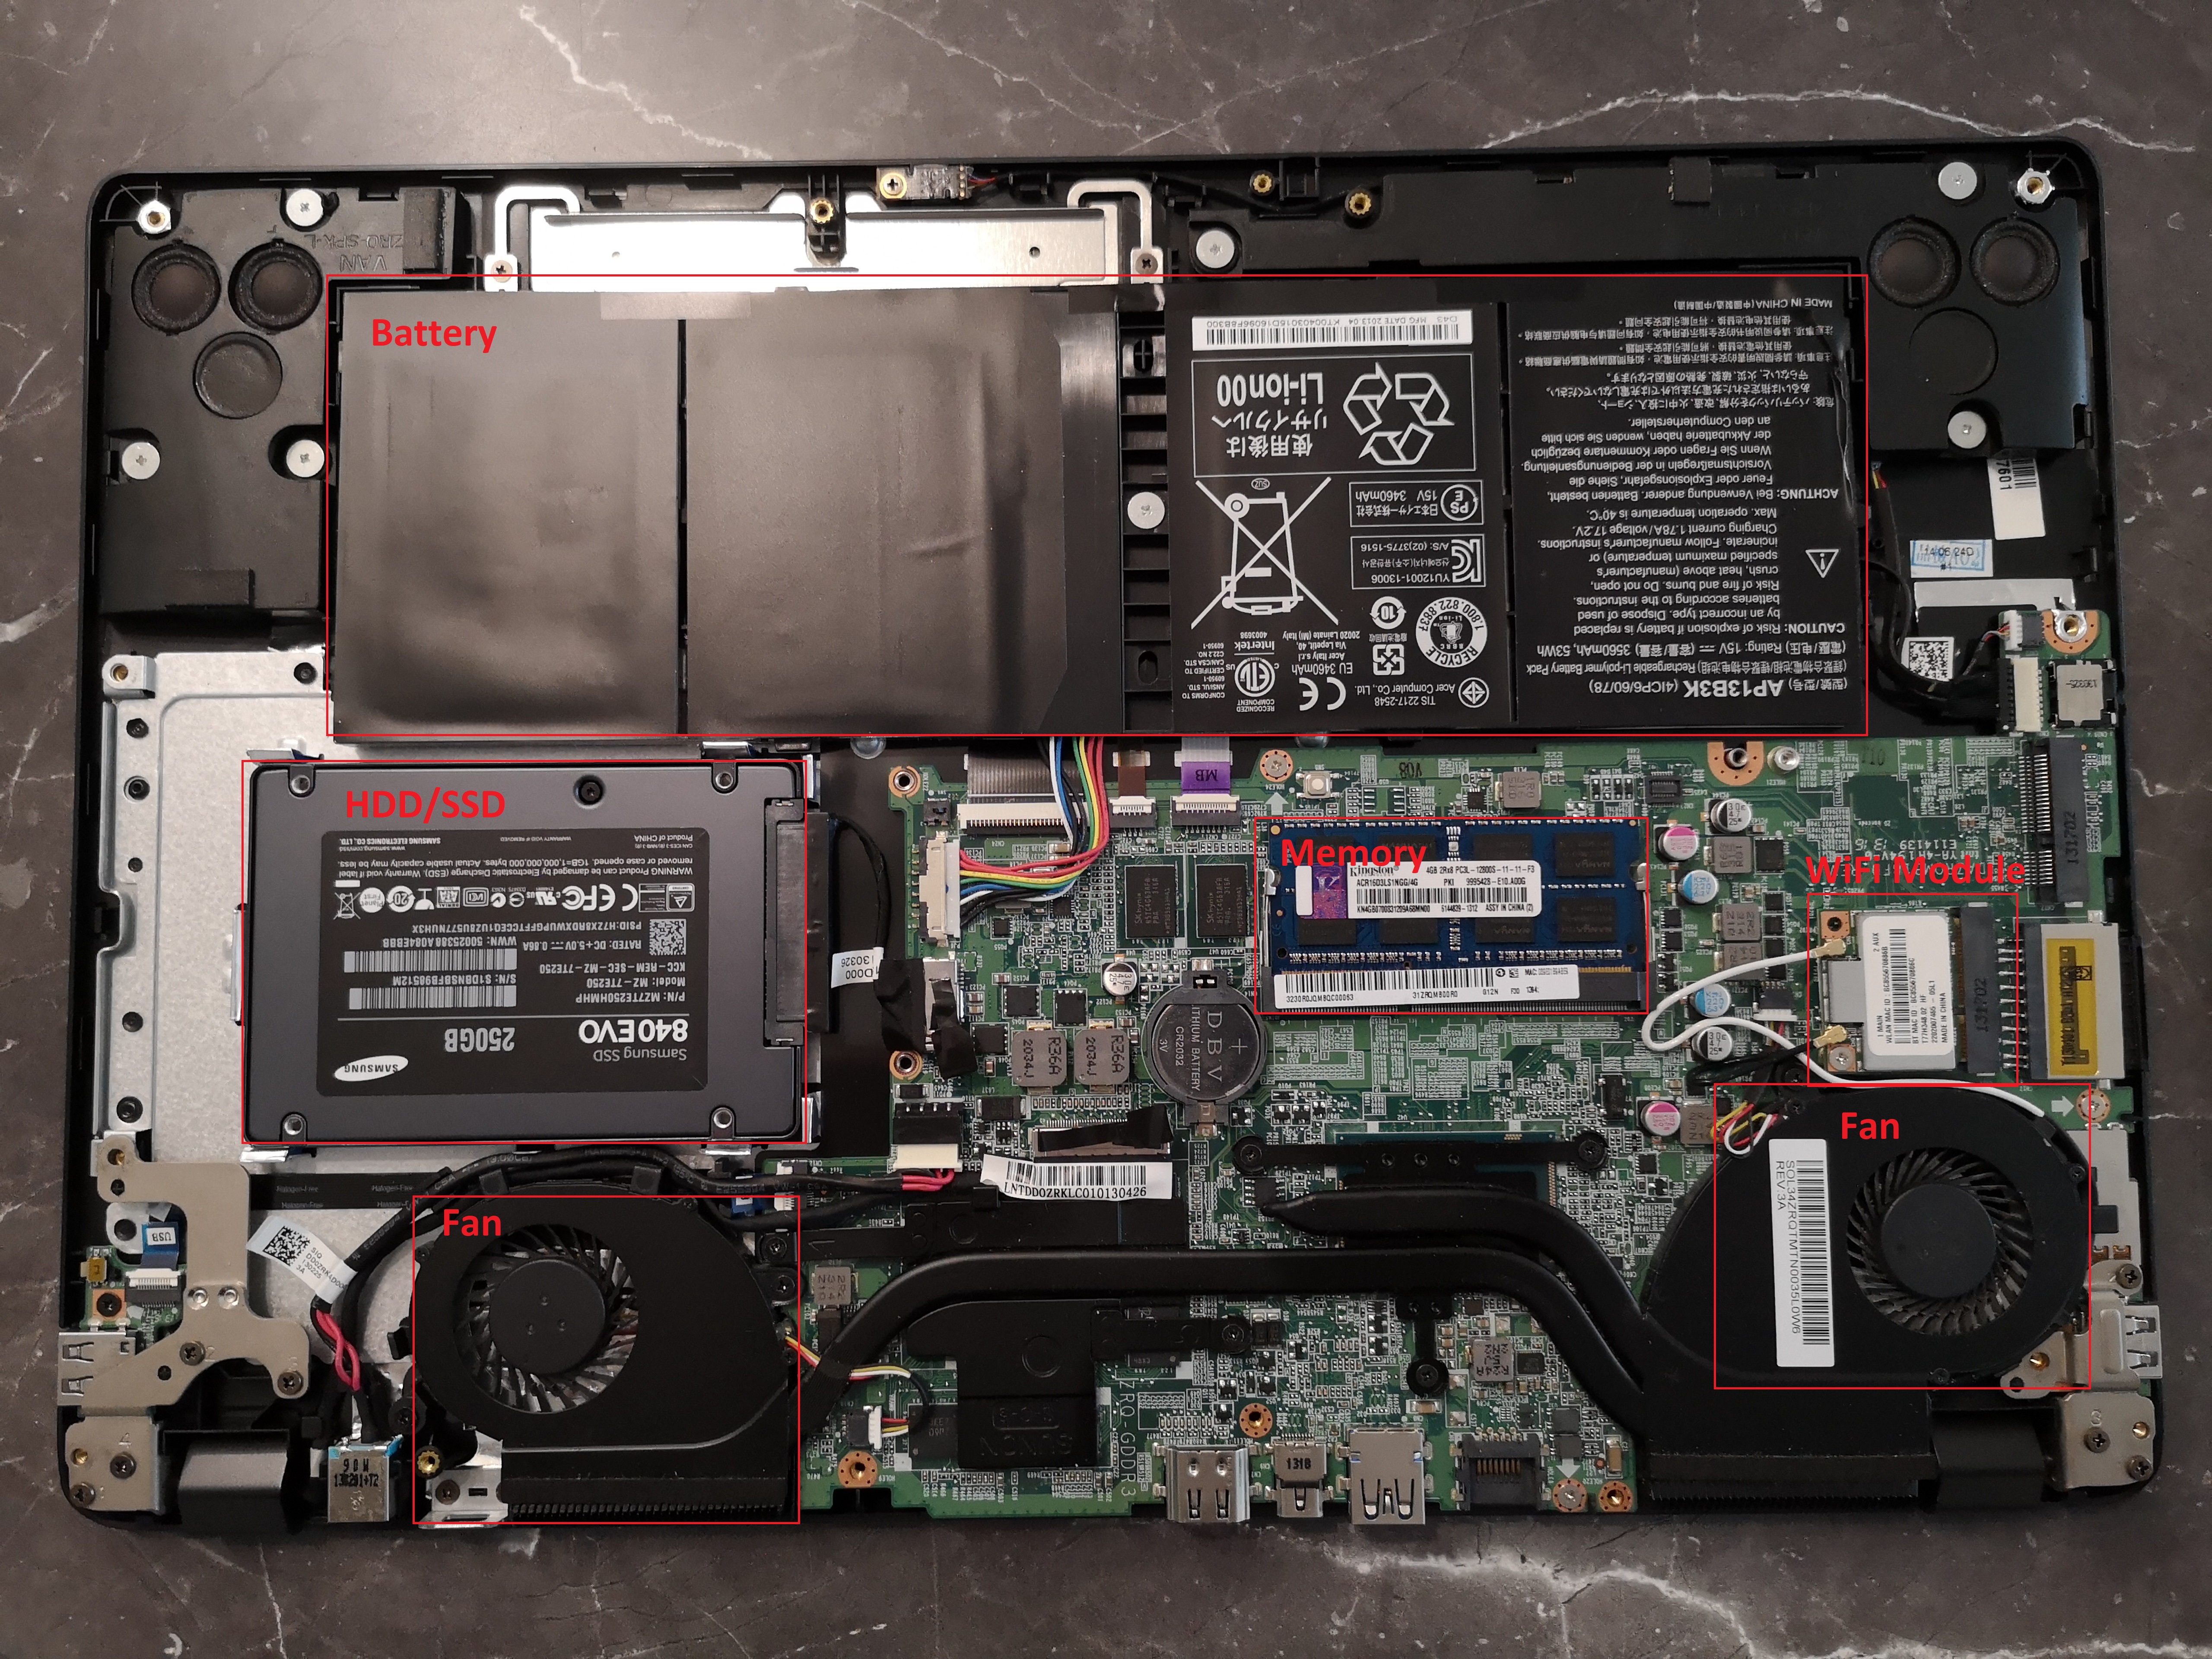
Finally, after the removal of the bottom case, you can spot nearly all essential components:
- The hard disk drive, which can be upgraded to a bigger one or to a solid state drive
- The memory, which can also be upgraded to increase memory size
- The fans, which can be cleaned to get rid of dust and to increase the cooling power
- The battery, if it needs to be replaced
- The WiFi module, if it needs to be replaced or upgraded
- … and of course there is no limitation about further disassembling if you need to exchange other parts.
Acer Aspire V5-573G Disassembly
For additional guides about the replacements of single part, I definitely recommend you to check out iFixit
 Disassembly")


 Disassembly")


 Disassembly")